Let the Windows 10 Start menu index the actual start menu for a change

I remember when I booted Windows Vista for the first time, there where three things that stood out at the time:

  1. Actual working 64 bit support, which was useful for virtualization (yes, i know about XP x64. And no, it does not count).
  2. The new color scheme. lets face it, it was quite refreshing after years of blue and green (or gray for the classic users).
  3. The start menu search bar. At long last i could drop my 20+ layer start menu folder structure, just type the program you need and it will appear.

Over time I realized how much the start menu search bar improved the experience of working with windows vista as a day to day OS. At Microsoft HQ they must have also realized this, because the start menu search bar still existed in Windows 7.

Then windows 10 came out (I skipped the windows 8 and 8.1 disaster). Unfortunately Microsoft figured it was a good idea to use the start menu search to search the entire user profile including: documents, downloads, email, and much more. This meant it was now possible to search for a program, and have the installer for this program listed before the program itself (and this happens quite often). It also introduced some weird behavior where the first three letters of a program will give a hit, but the first four letters wont give the same hit. And in a lot of cases programs would not show up at all.

Fortunately we can fix most of the problems by limiting the indexing for the start search bar to only the start menu.

But first we need to make sure all hidden files and folders are viable in windows Explorer.

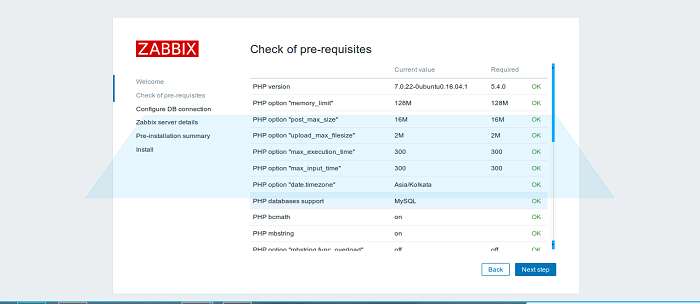
In a windows Explorer windows click the “view” tab -> “options” -> “view” tab. You should now see the window from image1 (below)

image1

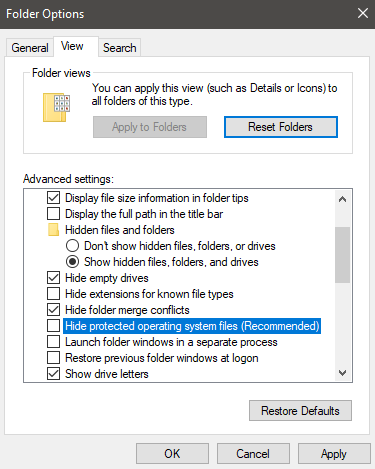
Make sure the “Hide protected operating system files (Recommended)” is NOT checked, and “Show hidden files, folders and drives” is selected.

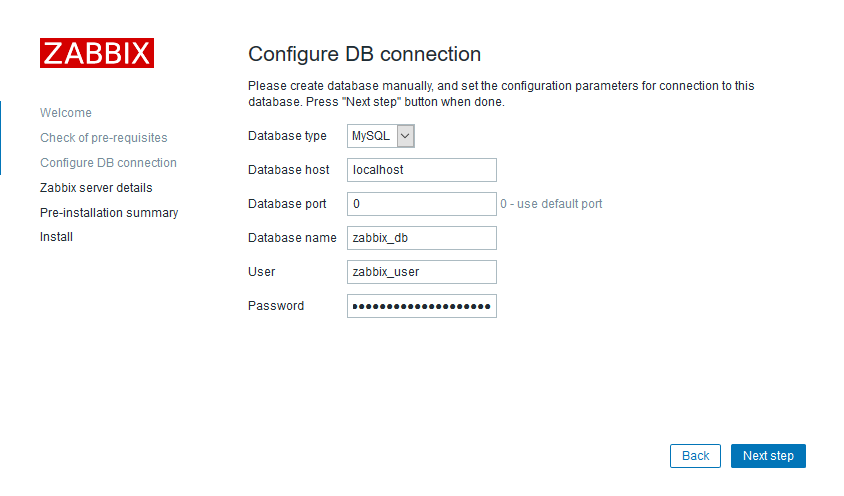
Next up, open the indexing options by typing “indexing options” in the start menu search bar (and hope it works) image2 should now appear.

image2

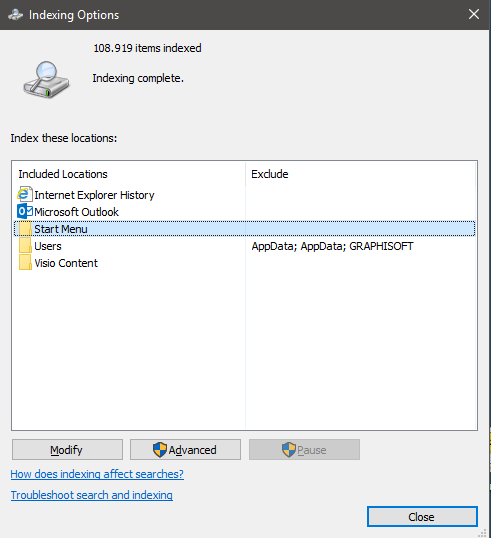
As you can see, there are a lot of non start menu related folders, and the entire users folder is in the index. To change this, click the “Modify” button.

image3

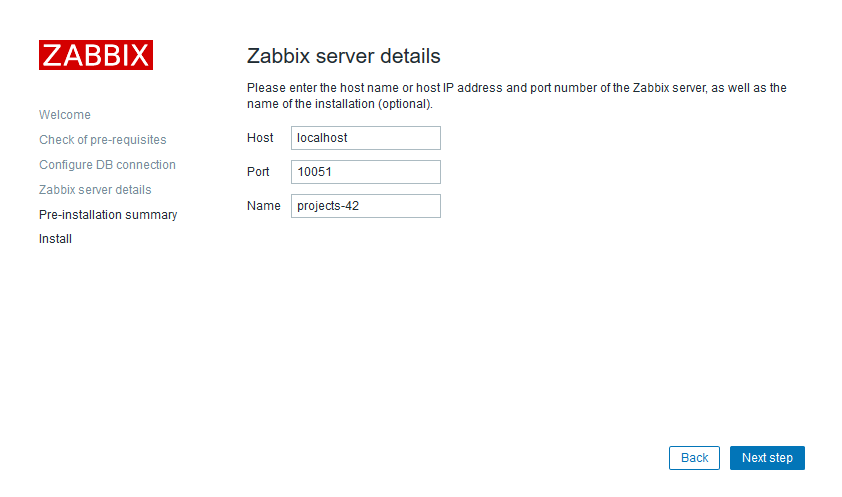
Now deselect all unwanted folders (if you click on a folder/item in the bottom half of the screen (image3) it will auto navigate to the fonder in the top half) and use the top part of the windows (image3) to browse to the 2 start locations.

One is located in “C:\ProgramData\Microsoft\Windows\Start Menu”, the other one is located in “C:\Users\<yourUserName>\AppData\Roaming\Microsoft\Windows\Start Menu”.

Check the boxes before both the start menu locations and click “OK”.

image4

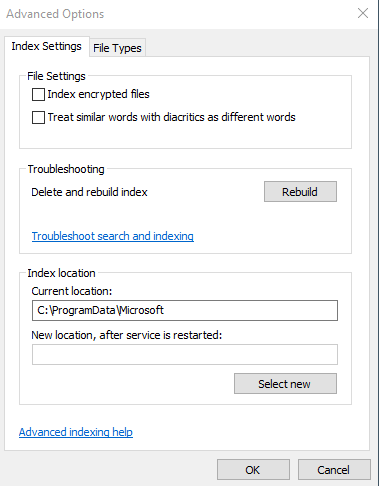
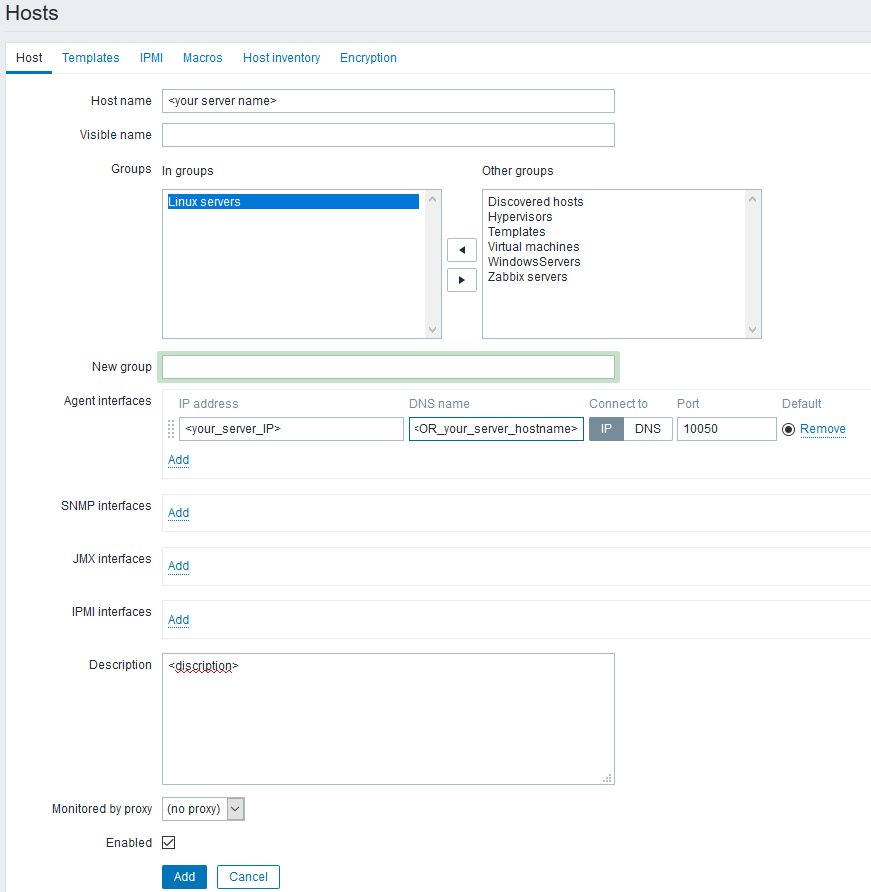
Next click on “Advanced” -> “Rebuild” -> “OK” (image4).

image5

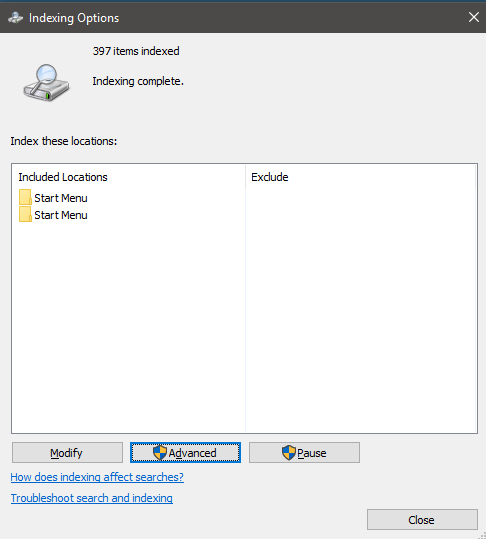
As you can see, there are only two folders left in the index overview, and the number of indexed items has dropped to a more reasonable amount.


The start menu search bar will now function almost like in Windows vista and 7. And it will find the program your looking for 🙂


Ubuntu 18.04 LTS kiosk for web or RDP

In this article we will show how to setup a browser or RDP kiosk, based on Ubuntu server 18.04 LTS. Because we are using the server edition the kiosk system will have a very small footprint and way less packets installed when we compare it to a stripped down desktop kiosk.

First we need to install a fresh Ubuntu 18.04 LTS system. After the installation is complete, make sure to install any available updates by executing the following commands:

sudo apt-get update
sudo apt-get upgrade -y
sudo reboot

Kiosk purpose

Before we start configuring the kiosk, we first need to think what we want to show on the kiosk unit. Different content types require different applications and configurations. in this article we will show how to install and use a chrome based kiosk and a Remmina (RDP) based kiosk. Other applications/types of content are also possible but might require additional research.

The kiosk can only serve one type of content at the time.

To go with the web content kiosk, install chrome using the following command:

sudo apt-get install --no-install-recommends chromium-browser

To go with the remote desktop kiosk, install Remmina using the following command:

sudo apt-get install remmina -y

Automatic logon

Our kiosk needs to log on automatically, to achieve this we will overwrite the getty service configuration to change the way TTY1 is started (TTY1 is the default console output on most Linux based servers). To overwrite a part of the getty configuration we need to execute the following command:

sudo systemctl edit getty@tty1

The above command will create an overwrite file for the getty configuration. paste the following text in this file to enable automatic login (replace <username> with a local account on the Ubuntu server):

[Service]
ExecStart=
ExecStart=-/sbin/agetty -a <username> --noclear %I $TERM

Because the user configured in the above file will automatically logon to the system at boot, it is recommended to make sure the user can not access sensitive documents (which should not be stored on a kiosk system in any case). the selected user may be in the sudoers file, this will not present a security problem because sudo alway’s requires a password. For more information about auto logon: Muru, a user on askubuntu.com has written a very interesting answer about auto logon.

Graphical user interface

Ubuntu server has no X server and Window manager installed by default, its text only. Our kiosk needs a both a X server and a window manger to display any graphical applications.

Use the following command to install the X server (X.org) and windows manager (Openbox):

sudo apt-get install --no-install-recommends xserver-xorg x11-xserver-utils xinit openbox -y

with the GUI installed, we need to configure it. X.org will work out of the box, but openbox requires some minor configuration changes to start our kiosk application.

The Openbox configuration file is located at “/etc/xdg/openbox/autostart”. We can open it for editing with the following command:

sudo nano /etc/xdg/openbox/autostart

Replace the contents of the Openbox configuration file with one of the below ones, depending on witch packet you installed earlier.

Web content/Chrome (replace <http://your-url-here> with your desired url:

# Disable any form of screen saver / screen blanking / power management
xset s off
xset s noblank
xset -dpms

# Allow quitting the X server with CTRL-ATL-Backspace
setxkbmap -option terminate:ctrl_alt_bksp

# Start Chromium in kiosk mode
sed -i 's/"exited_cleanly":false/"exited_cleanly":true/' ~/.config/chromium/'Local State'
sed -i 's/"exited_cleanly":false/"exited_cleanly":true/; s/"exit_type":"[^"]\+"/"exit_type":"Normal"/' ~/.config/chromium/Default/Preferences
chromium-browser --disable-infobars --kiosk '<http://your-url-here>'

Remote Desktop/Remmina (change <path to remmina file> to the actual path to the desired remmina file):

# Disable any form of screen saver / screen blanking / power management
xset s off
xset s noblank
xset -dpms

# Allow quitting the X server with CTRL-ATL-Backspace
setxkbmap -option terminate:ctrl_alt_bksp

# Start Remmina in kiosk mode
remmina -c <path to remmina file>

#start remmina in normal mode (for configuration purposes)
#remmina

If you don’t have a .remmina file, comment out row 10 and uncomment row 13, now when the xserver is started Remmina will start in normal mode.

The main part of the configuration is done. To start the GUI simply type “startx” in the console, the GUI can be closed by pressing ctr+alt+backspace.

Autostart Graphical user interface

We can not call a system a kiosk if we need to manually type “startx” after every reboot. So lets make sure we wont have to.

We can accomplish this by configuring the “.bash_profile” file for the auto login user. Assuming we are alredy logged on as the auto logon user, use the following commands to create or open the “.bash_profile” file for editing:

cd
sudo nano .bash_profile

now append the following line to the file:

[[ -z $DISPLAY && $XDG_VTNR -eq 1 ]] && startx


Reboot and enjoy your kiosk 🙂


A large part of this article is based on THIS blog-post about a similar setup on a raspberry pi.

Network configuration in Ubuntu Server 18.04

As you might have heard, Ubuntu (server) 18.04 uses a new network configuration system named Netplan.

Well, Netplan is not entirely new, it was introduced in Ubuntu 17:10 but I did not pay to much attention to it at the time because I prefer the Ubuntu LTS editions.

The first big change you will notice is the location the where the network configuration is stored. If you grab the default image form the Ubuntu website, there will be a file named “50-cloud-init.yaml” which is located in “/etc/netplan/”. The funny part is, this is not the only place you can store network configuration files. A blog post on the Ubuntu blog shows there are 3 locations available for storing network configurations (in order of importance):

  • /run/netplan/*.yaml
  • /etc/netplan/*.yaml
  • /lib/netplan/*.yaml

You can place any number of .yaml files in each of the above directory’s, where the lowest alphabetical filename will be the leading one (A*.yaml before B*.yaml). If a filename is used in multiple directory’s, the one in the most important directory will be the leading one.

Did I mention the files are YAML? Great lets use an indentation dependent format, what could possibly go wrong when using nano or VI without formatting and validation tools.

Needles to say, this might become a bit confusing when you need to troubleshoot a system you did not configure or maintain.

But enough of my ranting, lets she how we can configure a static IP address.

Luckily Canonical did set up a webpage to provide information about Netplan (https://netplan.io) this page also contains a neat set of Netplan examples.

The main page also explains that the default configuration location should be in “/etc/netplan/” there are no guidelines about the names for the configuration files, so you can “go ham” on those.

The configuration itself is kind of straight forward here is a basic IPv4 configuration with 2 name servers:

network:
  ethernets:
    eth0:
      addresses:
        - 192.168.0.2/24
      gateway4: 192.168.0.1
      nameservers:
          addresses: [192.168.0.1,8.8.8.8]

If you want IPv4 DHCP instead see below (for IPv6 set “dhcp6” to true and “dhcp4” to false):

network:
  version: 2
  ethernets:
    eth0:
      dhcp4: true
      dhcp6: false

Don’t forget to apply the configuration when your done

sudo netplan apply

If you need a more advanced configuration like more addresses on one interface or VLANs, check out the comprehensive example page on the Netplan website (https://netplan.io/examples).

They did a good job showing of a lot of differed possibility’s 🙂


Deploy a Zabbix server to monitor your infrastructure

If you maintain a ICT infrastructure you probably use (or your looking to use) a monitoring solution to monitor your ICT infrastructure. Detecting, and fixing, problems before end users start experiencing them is something most ICT professionals love to accomplish, preferably every time a problem occurs.

Zabbix is an open-source monitoring solution for servers, network devices and (web) applications. In this article we will setup a Zabbix server and install the Zabbix client on a Linux and a Windows server.

Setting up the Zabbix Server

We will be using a Ubuntu 16.04 server for the Zabbix server (i know 18.04 is already out there but because of some hypervisor related problems i am not yet able to install 18.04).

Before we start installing Zabbix, we need to install a number of prerequisites. to installe these type in (or copy) the following commands:

sudo apt-get update
sudo apt-get install apache2 libapache2-mod-php7.0 php7.0 php7.0-xml php7.0-bcmath php7.0-mbstring mysql-server -y

Now we need to add the Zabbix repository. This will ensure we will receive updates for Zabbix when the are released.

Zabbix uses an installer packet to add the repository to the system. Use the following commands to download and install the Zabbix repository:

wget http://repo.zabbix.com/zabbix/3.2/ubuntu/pool/main/z/zabbix-release/zabbix-release_3.2-1+xenial_all.deb
sudo dpkg -i zabbix-release_3.2-1+xenial_all.deb

With that out of the way we can install Zabbix server and agent.

sudo apt-get update
sudo apt-get install zabbix-server-mysql zabbix-frontend-php zabbix-agent -y

Because Zabbix wont create its own database we will need to take care of it, use the following commands to log in to the mysql server and create the database (change <zabbix_user> and <zabbix_password> to a username and password):

mysql -u root -p
CREATE DATABASE zabbix_db character set utf8 collate utf8_bin;
GRANT ALL PRIVILEGES on zabbix_db.* to <zabbix_user>@localhost identified by '<zabbix_password>';
FLUSH PRIVILEGES;
exit;

cd /usr/share/doc/zabbix-server-mysql/
sudo zcat create.sql.gz | mysql -u <zabbix_user> -p zabbix_db

Now we have to point the Zabbix server to the newly created database. First we need to open the configuration file:

sudo nano /etc/zabbix/zabbix_server.conf

Now we have to find the DB configuration and configure it as follows:

DBName=zabbix_db
DBUser=<zabbix_user>
DBPassword=<zabbix_password>

Next up is the timezone. we have to change this in two files, the Zabbix config and the php config. you can find your timezone in this list: http://php.net/manual/en/timezones.php

Use the following commands to edit the Zabbix config:

sudo nano /etc/zabbix/apache.conf

# fint the line:
# php_value date.timezone Europe/Riga

# Replace it with 
php_value date.timezone <your_timezone>

Now for the php config:

sudo nano /etc/php/7.0/apache2/php.ini

# fint the line:
;date.timezone =

# replace it with
date.timezone = <your_timezone>

Now we can start Zabbix and make the service for the server and client start at boot (we also need to restart apache2):

sudo systemctl restart zabbix-agent
sudo systemctl restart apache2
sudo systemctl restart zabbix-server

sudo systemctl enable zabbix-server
sudo systemctl enable zabbix-agent

The zabbix server is now operational, so is the Zabbix agent. Now we have to configure the Zabbix web interface to be able to use the Server (and agent).

Navigate your browser to http://<the_ip_of_your_zabbix_server>/zabbix

You page should look like the following image:

Click “Next Step” to continue.


If you followed all staps above, the next page should be looking like this. All prerequisites should be met. Click “Next step” to continue. (I forgot to capture this page, so its looking a little different.  luckily Google has the solution to (almost) every problem).


Enter the database information you used while configuring the database and click “Next Step” to continue.


Now we can give a name to our Zabbix instance the hostname and port configuration can be left at the default stetting (unless you are already using this port for something else or you run the Zabbix server component from a different machine). Click “Next step” to continue.


The zabbix installation is now complete. Click “Finish” to navigate to the Zabbix login page.

The default login credentials are username: “Admin” and password: “zabbix”. Both username and password are case sensitive.

Installing the agent on a Linux host

Although we already installed the agent on the zabbix server during the setup process, the process of installing the agent  is explained here so it can be easily installed on other on Debian based Linux hosts.

First we need to add the repository (in my case I’m using xenial, if you are using another distro check this link for the available distro’s) :

wget http://repo.zabbix.com/zabbix/3.2/ubuntu/pool/main/z/zabbix-release/zabbix-release_3.2-1+xenial_all.deb
sudo dpkg -i zabbix-release_3.2-1+xenial_all.deb

Next up, install the agent:

sudo apt-get update
sudo apt-get install zabbix-agent -y

Now we need to tell the Zabbix agent where the server is located. To do this open the Zabbix agent configuration:

sudo nano /etc/zabbix/zabbix_agentd.conf

# find the line 
Server=

#change it to
Server=<the_ip_of_your_zabbix_server>


# find the line 
ServerActive=

#change it to
ServerActive=<the_ip_of_your_zabbix_server>


# find the line 
Hostname=

#change it to
Hostname=<the_hostname>

Make sure the service is started (with the new configuration) and it will start automatically after the next reboot:

sudo systemctl restart zabbix-agent
sudo systemctl enable zabbix-agent

Were all done here.

Installing the agent on a Windows host

Before we can install the agent, we first need to download it. The agent can be found at the following page “https://www.zabbix.com/download_agents“. Unlike the Linux agent, the Windows agent is not packaged into a handy installer. Luckily the Zabbix team made it easy to install the Agent service.

After downloading the Zip file from the above link, we have to extract the agent and place it somewhere convenient. I placed my agent files in “C:\ProgramData\zabbix_agent\” but any directory will do.

Next we have to edit the “zabbix_agentd.win.conf” file which is located in the “conf” directory:

# find the line
Server=

#change it to
Server=<the_ip_of_your_zabbix_server>


# find the line
ServerActive=

#change it to
ServerActive=<the_ip_of_your_zabbix_server>


# find the line
Hostname=

#change it to
Hostname=<the_hostname>

We are now ready to install the agent service. We can do this by calling the “zabbix_agentd.exe” with the “–install” and “— config” parameters.

The command to install the agent service is:

<location_of_your_zabbix_agent_C:\_path>\bin\<win64_or_win32>\zabbix_agentd.exe --config <location_of_your_zabbix_agent_C:\_path>\conf\zabbix_agentd.win.conf --install

To remove the agent use the following command:

<location_of_your_zabbix_agent_C:\_path>\bin\<win64_or_win32>\zabbix_agentd.exe --config <location_of_your_zabbix_agent_C:\_path>\conf\zabbix_agentd.win.conf --uninstall

If you open the “services” mmc snap-in you will see the “Zabbix Agent” service installed and ready to go.

Add a host to Zabbix

After installing the server and agent components we can finally start adding hosts to Zabbix.

To add a host, log in to the Zabbix webinterface, navigate to “Configuration”->”Hosts” and click the “Create host” button at the top right side of the screen.

Fill out the “Add host form” and put it in the desired group (select Windows servers if you are adding a Windows server, etc.). Click “add” to add the host to Zabbix.

Optionally you can add templates to the host (the default groups alredy have templates linked to them).

It can take some time (up to 50 min) to get the first redings in the Zabbix web-interface.


Congratulations, you now have a working Zabbix server with at least one host. Happy monitoring 🙂


MSSQL: keep your transaction log’s from exploding

I recently discovered that my employers database server was running out of storage space on the database volume. After some searching I traced the problem to our Xendesktop site transaction log file witch had grown almost 80GB in 3 months.

I never noticed problems with the transaction logs before but previously the SQL server was a physics machine with around 1 TB storage for the databases while the new database server is a VM with only 350GB available for the databases.

If you work with Microsoft SQL server from time to time, you might know that a database usually consists of two files. The database file “<dbname>.mdf” and the transaction log file “<dbname>.ldf”. The database file stores the current version of the database while the transaction log file saves all changes to the database. It is important to have a transaction log, because it enables you to rollback the database to a point in time, or recover the database after a software crash or an unexpected power failure.

There are 3 modes in with the transaction log can operate: Full, Bulk-logged and Simple. I wont be going into detail about the different recovery models, Microft has a good article about this subject.

In short, Full saves all transactions indefinitely while Simple removes them after committing them to the database. Bulk-logged is almost the same as Full but it has some enhancements for logging bulk transactions.

Our Citrix database was configured to use the Full recovery model, this is the default setting.

To solve this issue while retaining the ability to recover data in the event of a crash we will have to set up transaction log back-ups. If configured right this can be an automated process.

Follow the following steps to back-up a transaction log:

From the SQL Server Management Studio, click right on the DB of witch you want to backup the transaction log. Navigate to Tasks and click “Back Up…“.


In the Back Up Database dialog on the General tab, change the backup type to “Transaction log” and specify a destination for your backup.


In the Back Up Database dialog on the Media Options tab, check the “Verify backup when finished” checkbox if you want SQL server to verify the backup after it finishes.


In the Back Up Database dialog on the Backup Options tab, Set backup compression to “Compress backup” (unless you just want to move your transaction log in witch case you can live the setting in the default).


At this point you can simply click the OK button and the backup will start. In this case it will be a one time only backup. We ICT people like to automate things so we wont have to repeat actions over and over again. Fortunately, we can turn this process in a automated task.


to turn the above process in an automated task, click the downward arrow next to the script button at the top of the dialog and select “Script Action to Job” (or press “Ctrl+Shift+M”).


Unfortunately SQL server Express edition wont allow automated jobs so for the rest of the process i have used a much older SQL Server Standard Instance


Clicking on the “create job” button will open a new dialog named “New Job”. Most of the information on this page and the script itself are already added to the new job. Navigate to the “Schedules” tab to schedule the new job.


At the schedule tab we can create new schedules. in this case we want to backup the transaction log every Sunday at 1 AM. You can set multiple schedules for each job.


On the notifications tab we can set what type of notifications we want to receive from this Job. You can configure this to your liking. Click OK to Save the Job.


If everything went as planed, we now have an automated transaction log backup Job. Unfortunately the transaction log remains the same size as it was before. to release the backed up space we need to shrink the Transaction log.

WE DON’T WANT TO SHRINK THE TRANSACTION LOG TO OFTEN, GROWING THE LOG IS A SLOW PROCESS!!!

If your transaction log is huge and you want to reclaim some of the space, continue following these steps:

to be able to shrink the transaction log file, we first need to switch the database to simple recovery mode.

click right on the database you want to shrink and click on “Properties”.

In the property’s dialog, select the options tab and select “Simple” from the recovery model drop down list. Click “OK” to apply the change.


Right click the database you want to shrink, navigate to Tasks -> Shrink and click “Files”.


In the shrink File dialog, change the file type to “Log” and make sure the shrink action is set to “Release unused space”. Click “OK” tot start the shrink action.

Don’t forget to change the recovery model back to full, if it was set to full to begin with 😉


Citrix Xenserver and pfSense, slow traffic problems

A while back, I added a pfSense installation to my home lab environment.

pfSense is a opensource network firewall/router operating system which offers a large amount of additional (3e party) modules to extend its functionality such as OpenVPN, Snort, etc. At this time, I am mainly interested in the OpenVPN functionality and I would very much like to play around with the ability to set up a IDS (Intrusion Detection System).

With pfSense being a software only implementation, I started by setting up a VM on my home lab Xenserver and initially I was not disappointed. The installation went very smoothly and in less than 20 minutes after browsing to the pfSense download page, I found myself staring at the pfSense web interface.

I completed setting up a number of basic rules, and performing some basic tests (like pinging internal and external addresses) without incidents, the problems started when i tried to open a webpage through the pfSense NAT. My browser was unable to open the page (located on an other test server). a number of troubleshooting steps later I was able to verify the connections between my PC and the pfSense VM, and the connection between the pfSense VM and the webserver VM were both working as expected, the rule-sets on the pfSense VM ware also configured correctly.

While searching on the web for a solution to my problem I stumbled onto a very interesting topic on the pfSense forums.

pfSense is based on FreeBSD, and FreeBSD wont accept traffic if the checksum on the TCP packet is not valid. to solve this problem two steps are needed.

1. Hardware checksum offloading needs to be disabled in the pfSense configuration. To achieve this navigate to “System > Advanced > Networking” in the pfSense interface and enable the “Disable hardware checksum offload” option.

2. Hardware checksum offloading needs to be disabled on the pfSense VM virtual interfaces. To achieve this we first need to know the interface uuid’s of the interfaces. Use the following command on the Xenserver CLI interface to get the UUID’s:

xe vif-list vm-name-label=<pfSense vm name case sensitive>

The UUID’s can be found after the “uuid ( RO) :” label.

to disable to hardware checksum offloading we need the following commands:

xe vif-param-set uuid=<UUID> other-config:ethtool-tx="off"
xe vif-param-set uuid=<UUID> other-config:ethtool-rx="off"

I was able to get by with only the tx disabled, but I mainly tested with download traffic so some upload testing is still required.


Add a local storage repository (SR) to Xenserver

Recently i added a new SSD to my home lab hypervisor.

Xenserver does not detect new disks by default, so I had to add the drive manual, luckily this is not a complicated process (some command line experience is required).

First we need to find the device name of the new drive, for this we use following command:

fdisk -l

Usually the last shown device is the newly added one, in my case it was /dev/nvme0n1 as I was adding a NVME drive, normally it will be something like /dev/sdb, where b is the position of the drive (first drive is sda, second is sdb, etc.).

Now we know the which drive we are adding to the system we can choose how we want to format the drive. We can choose between EXT and LVM, in short LVM is faster but less flexible (no thin provisioning). Usually you will want to keep all your local repository’s the same.

In this case I have chosen to go with EXT because i need the flexibility and the speed is good enough for me.

Now we can add the repository, we will use the following command:

xe sr-create name-label=<your SR name> shared=false device-config:device=/dev/<device name> type=<lvm|ext> content-type=user


Collabora CODE, a opensource selfhosted webbased officesuite with Nextcloud integration

If your reading this article, you probably know Microsoft office. And you probably also know about Microsoft’s move to the cloud. Today I can tell you one of Microsoft’s competitors has made the same move, and its not Google.

LibreOffice is well known for its open source and free office solution unfortunately LibreOffice always needed to be installed on a Windows, Linux or MacOS operating system. Because of this it was not usable on Android, IOS and ChromeOS (and probably a number of other operating systems).

Around 2012 LibreOffice started a side project to solve this issue once and for all. This project aimed to run LibreOffice in a webbrowser, enabling all devices with a webbrowser to use this amazing piece of software.

Unfortunately this project was abandoned somewhere along the way and this amazing software never saw the light of day. And with the death of the LibreOffice web project the dream for real productivity where you are the owner of your own data also died, or so I thought.

Recently (a couple of months back but I did not have time to try it sooner) I discovered Collabora CODE. Collabora is a company which created a webbased LibreOffice, and found some spare time to integrate there product with a number of other applications. One of those applications is Nextcloud.

In this article I will outline the steps needed to install your very own Collabora CODE installation (with LetsEncrypt)  and integrate this installation  with Nextcloud, all of this without using Docker.

As with the WeKan tutorial, I am using 2 Ubuntu 16.04 Servers. One with the Nextcloud installation (WEB) and the other one with the Collobara CODE installation (CODE). This setup differs a bit from the tutorial on the Collabora webpage, but I think it is better to have your services spread out over a number of servers, rather than have them all on one server. This approach will complicate things a little. Since I only have one public IP address available I will have to use a reverse proxy to make this setup work from outside my LAN.

So first of all we have to install Collabora CODE on the “CODE” server. For this part we simply follow the instructions From the Collabora page:

# import the signing key
$ apt-key adv --keyserver keyserver.ubuntu.com --recv-keys 0C54D189F4BA284D
# add the repository URL to /etc/apt/sources.list
$ echo 'deb https://www.collaboraoffice.com/repos/CollaboraOnline/CODE ./' >> /etc/apt/sources.list
# perform the installation
$ apt-get update && apt-get install loolwsd code-brand

When this is done we have to make sure the CODE box will communicate with the revere proxy over http (we have only one IP so no Certificates on the CODE box).  And while where editing the Collabora CODE configuration we might as well make all the necessary changes.

On the CODE box, open the Collabora CODE configuration file:

$ sudo nano /etc/loolwsd/loolwsd.xml

And make the following changes:

<!-- First we set the hostname of the collabora server. Find the following line and change the "(your collabora url office.examle.com)" to your needs  -->
<server_name desc="Hostname:port of the server running loolwsd. If empty, it's derived from the request." type="string" default="">(your collabora url office.examle.com)</server_name>

<!-- Now find the  "<ssl desc="SSL settings">" part and edit the first 2 lines to reflect the below ones-->
<enable type="bool" default="true">false</enable>
<termination desc="Connection via proxy where loolwsd acts as working via https, but actually uses http." type="bool" default="true">true</termination>

<!-- Now we need to configure the backend document storage, Find the  "<storage desc="Backend storage">" part and add 2 rules to the "WOPI" part to allow your Nextcloud domain and the Nextcloud server IP to access to CODE box -->
<!-- Make shure you escape all "." with a "\" -->
<!-- the new rules must look like this (with your extual IP and dns names of course) -->
<host desc="Regex pattern of hostname to allow or deny." allow="true">nextcloud\.example\.com</host>
<host desc="Regex pattern of hostname to allow or deny." allow="true">192\.168\.x\.x</host>

<!-- Last but not least, add the web admin console login data to the config -->
<!-- find the "<admin_console desc="Web admin console settings.">" part and edit the following 2 lines to your needs -->
<username desc="The username of the admin console. Must be set.">(loginusername)</username>
<password desc="The password of the admin console. Must be set.">(supersecretpassword)</password>

Now restart the Collabora CODE service with the following command:

$ sudo service loolwsd restart

Now we move our attention to the WEB box. Here we will need to set up our reverse proxy, install the SSL certificates and make the CODE -> Nextcloud connection.

We will start with the reverse proxy (this part is almost the same as with the WeKan tutorial).

First we need to enable the Apache reverse proxy, SSL and header mods (if the are not enabled already).

$ sudo a2enmod proxy
$ sudo a2enmod proxy_http
$ sudo a2enmod headers
$ sudo a2enmod ssl
$ sudo service apache2 restart

When this is done we will create a new virtual server config for the http version of the Collabora CODE installation, this virtual host will only be used for the Lets encrypt certificate validation, so int wont actually point to the Collabora CODE installation.

# first create a directory for the virtualhost and set the webserver user as owner
$ sudo mkdir /var/www/code
$ sudo chown www-data:www-data /var/www/code

# now create the site config
$ sudo nano /etc/apache2/sites-enabled/code.conf

# input the followin (change where needed)
<VirtualHost *:80>
    ServerAdmin <youre email address>
    DocumentRoot /var/www/code
    servername <website adres office.example.com>
    ErrorLog ${APACHE_LOG_DIR}/code_error.log
    CustomLog ${APACHE_LOG_DIR}/code_access.log combined
</VirtualHost>

Now we can run the Lets encrypt cert-bot and follow the instructions onscreen (if you don’t have cert-bot installed, you can install it by typing “sudo apt-get install certbot”):

$ sudo certbot

The Cert-bot wizard will have created a file named “code-le-ssl.conf”. Open this file with your favorite editor (I use nano) and edit it to reflect the following (make changes where needed):

<IfModule mod_ssl.c>
  <VirtualHost *:443>
    ServerName <youre_site_hostname>
    SSLEngine on
    SSLProxyEngine on
    ProxyPreserveHost on
    SSLCertificateFile /etc/letsencrypt/live/<youre_site_hostname>/fullchain.pem
    SSLCertificateKeyFile /etc/letsencrypt/live/<youre_site_hostname>/privkey.pem
    Include /etc/letsencrypt/options-ssl-apache.conf
    ProxyPass / http://<code_ip>:9980/
    ProxyPassReverse / http://<code_ip>:9980/
    Header always set Strict-Transport-Security "max-age=63072000; includeSubdomains;"
    <Proxy *>
      Order deny,allow
      Allow from all
    </Proxy>
    ServerAdmin <your_email>
    ErrorLog ${APACHE_LOG_DIR}/code_error.log
    CustomLog ${APACHE_LOG_DIR}/code_access.log combined
</VirtualHost>
</IfModule>

Now restart apache2 on the webserver:

$ sudo service apache2 restart

Because you wont be visiting the Collabora CODE installation manual it is not necessary to create a redirect for the http url.

We now have a Collabora CODE installation with LetsEncrypt certificate ready to go. All that left is to connect the Collabora CODE installation to the Nextcloud installation.

To Enable the link to Nextcloud we first have to install the Colabora online app in Nextcloud. This app can be found under “Office & text” in the applications section of your Nextcloud installation to enable this app click the Enable button. If the app is enabled it will look like the picture below

Enabled Collabora Online app

After enabling the app, an extra settings item will be added to the Nexcloud admin panel. Go to the Admin panel and click the “Collabora Online” menu item. Here You can add the external url to your Collabora CODE installation. This is the same URL we added to the Collabora CODE configuration (office.examle.com). This will look like the picture below:

Collabora Online Settings


If all went well, you will now be able to create and open most office files from your Nexcloud installation and edit them directly from your webbrowser.


Images by ColoboraOffice.

source: https://en.wikipedia.org/wiki/Kanban_board

kanban with wekan: self-hosted trello-like web-app

Almost everyone knows the online productivity platform Trello. Trello is a Kanban tool and can be used virtually every problem as long as the problem involves tracking something. Whether you are trying to keep track of time, tasks or inventory, Kanban is a good way to go.

Kanban was was originally designed as a inventory control system, to help automate production lines in factory’s. Over the years countless tools (like Trello) have been created to help with using Kanban for various purposes. Nowadays lots and lots of people use those Kanban tools without knowing anything about the Kanban method. And for most of them, this works just fine.

This post is not about the Kanban method, its not even about a Kanban tool. It is about setting up a self-hosted Kanban tool.

Now the first question is, why would you host you’re own Kanban tool while there are plenty free tools on the marked? Well, it mostly comes down to security, trust and privacy. When I’m working on a project, I want to be able to put sensitive data on my carts. While this data often is not interesting for a company like Trello it might be interesting for other company’s. In my opinion the question you should be asking yourselves is, do you trust a company like Trello with the data you want to put on to there service, do you expect them not to make money of a “free” service and can this impact your business in a negative way.

So after using Trello for some time, i started looking into a good self-hosted solution. I tried a number of Kanban tools, and eventual chose for Wekan.

Source: https://wekan.github.io/
Image source: https://wekan.github.io/

Of course self-hosted applications wont work directly after you have chosen to use them, you need to run them on your own system/server (or on a cloud-hosted system, VPS, etc.).

You can get Wekan from there releases page, they serve Wekan in 4 flavors:

  • A docker container
  • A sandstorm App
  • A Ubuntu Snap package
  • A virtualbox image

because I was already planning on using a Ubuntu server for this project, the Snap package was the logical choice.

Snap packages are super easy to set up, you basically execute the command:

$ sudo snap install <snap_package_name>

On the Wekan wiki there is a short and to the point installation tutorial, but for basic installations the following will be sufficient:

$ sudo snap install wekan

After the above command completes, Wekan will be running at “http://<ip_of_the_system>:8080”.

When you navigate to the fresh Wekan installation, you don’t have a user account to log in with. in stead use the build in registration feature on the login page. The first user you will create will automatically be a administrator.

Great, now we have a working local Wekan installation. The next step is to make this installation available to the big and scary world wide web. And because we font want to send our sensitive data over the internet unencrypted, we will also implement TLS with Lets encrypt

In my situation, the server running Wekan and the main web server are 2 separate Ubuntu installations. For this to work we will use a reverse proxy, and because my main web server runs Apache it will be a Apache reverse proxy. If you are using the same installation for both, the next part will not be needed, see the Wekan wiki for more information on this.

First we need to enable the Apache reverse proxy, SSL and header mods (if the are not enabled already).

$ sudo a2enmod proxy
$ sudo a2enmod proxy_http
$ sudo a2enmod headers
$ sudo a2enmod ssl
$ sudo service apache2 restart

When this is done we will create a new virtual server config for the http version of the Wekan installation, this virtual host will only be used for the Lets encrypt certificate validation, so int wont actually point to the Wekan installation.

# first create a directory for the virtualhost and set the webserver user as owner
$ sudo mkdir /var/www/wekan
$ sudo chown www-data:www-data /var/www/wekan

# now create the site config
$ sudo nano /etc/apache2/sites-enabled/wekan.conf

# input the followin (change where needed)
<VirtualHost *:80>
        ServerAdmin <youre email address>
        DocumentRoot /var/www/wekan
        servername <website adres wekan.example.com>

        ErrorLog ${APACHE_LOG_DIR}/wekan_error.log
        CustomLog ${APACHE_LOG_DIR}/wekan_access.log combined
</VirtualHost>

Now we can run the Lets encrypt cert-bot and follow the instructions onscreen (if you don’t have cert-bot installed, you can install it by typing “sudo apt-get install certbot”:

$ sudo certbot

The Cert-bot wizard will have created a file named “wekan-le-ssl.conf”. Open this file with your favorite editor (I use nano) and edit it to reflect the following (make changes where needed):

<IfModule mod_ssl.c>
    <VirtualHost *:443>
        ServerName <youre_site_hostname>
        SSLEngine on
        SSLProxyEngine on
        ProxyPreserveHost on
        SSLCertificateFile /etc/letsencrypt/live/<youre_site_hostname>/fullchain.pem
        SSLCertificateKeyFile /etc/letsencrypt/live/<youre_site_hostname>/privkey.pem
        Include /etc/letsencrypt/options-ssl-apache.conf

        ProxyPass / http://<wekan_ip>:8080/
        ProxyPassReverse / http://<wekan_ip>:8080/
        Header always set Strict-Transport-Security "max-age=63072000; includeSubdomains;"
        <Proxy *>
            Order deny,allow
            Allow from all
        </Proxy>

        ServerAdmin <your_email>

        ErrorLog ${APACHE_LOG_DIR}/wekan_error.log
        CustomLog ${APACHE_LOG_DIR}/wekan_access.log combined
</VirtualHost>
</IfModule>

Now restart apache2 on the webserver:

$ sudo service apache2 restart

You can add a redirect to the http version of the site, so you wont have to type “https://” every time you want to visit your Wekan installation.

# create a redirect index.html
$ sudo nano /var/www/wekan/index.html

# insert the following (edit where needed)

<HTML>
<head>
<meta http-equiv="refresh" content="0;URL=https://<your_domain_here>/" />
</head>
<body>
nothing to see here, go to <a href="https://<your_domain_here>/">this location</a> for a more useful page.
</body>
</HTML>

After the above changes we need to let Wekan know its new url (the one you will be using to access Wekan), this can be done using the following command:

$ sudo snap set wekan root-url="https://<your_wekan_url>"

After this last change, the Wekan service needs a restart:

$ sudo systemctl restart snap.wekan.wekan


Congratulations, You now have a working Wekan installation which is accessible from the internet.


Having the Wekan installation up and running is one thing. Maintaining it is another. Luckily over at Wekan there are a number of articles for maintaining your Wekan server, one of the most important ones is “backup and restore“. From time to time you might want to update your Wekan installation. Upgrading a snap packet is just as easy as installing it, just enter the following command:

$ sudo snap refresh wekan


Have fun with your Wekan installation


featured image from: https://en.wikipedia.org/wiki/Kanban_board

Repairing Windows Software RAID 1, not as easy as you might expect

At work, we have a number of servers which use the default windows software RAID implementation to insure OS disk redundancy (RAID 1). whether Software RAID 1 is a good solution for the situation is debatable, but this is not part of the scope for this article.

One Thursday morning I noticed one of the OS disks on the SQL server was showing up as missing in Windows disk manager. The server was still running fine, this is why we use RAID 1 in the first place. Of course the defective drive needed to be replaced as soon as possible. So I went out, bought a new drive and told my colleagues the system would not be available in the evening.

Normally, swapping a drive is super easy. You just replace the defective drive, tell windows to drop the missing drive from the mirror and create a new mirror with the still working drive and the new drive.

Unfortunately Windows disk manager came up with the following error after trying to create a new mirror: “All disks holding extends for a given volume must have the same sector size, and the sector size must be valid.“. bummer, after some googling it became apparent it would not be possible to create a mirror using this combination of disks. Luckily it would be able to clone the old disk to the new disk. Clonezilla to the rescue, or not…

After booting from my Clonezilla thumb-drive and walking trough the disk cloning wizard I got an error stating that the disk could not be cloned to the new drive because the new drive is 5MB smaller. Well that’s not great news, but I could still clone the separate partitions and fix the MBR using the windows installer thumb-drive. So I booted back in to windows, shrunk the data partition about 100MB, booted back in Clonezilla and started the partition clone. About one hour later the cloning process was finished. Unfortunately I was unable to fix the MBR because the BootRec utility was not able to find the windows instillation.

At this point it was somewhere around 1 AM, the server in question needed to be working at 7AM so I was beginning to get a little nervous. I could boot the old, working drive and let it run for another day, but whit a 7 year old disk this would be a big risk. so an other solution was desirable.

My next attempt to clone the disk turned out to be a good move. I used a very useful sysinternals utility named Disk2vhd this utility is able to clone a physical disk to a VHD or VHDX it can even backup the OS disk of a system while the system is running, by using shadowcopy. It took about 45 minutes but after that time I had my VHDX file. Unfortunately the utility (Vhd2disk) I used to restore the image to the new disk only accepted VHD files so I needed to run Disk2vhd again. Unfortunately (I use that word often in this post) Vhd2disk was unable to write back to the physical disk. I ran it twice, it crashed both times just before the process ended, my guess is it would not complete for the same reason Clonezilla could not perform a full disk clone.

Just after the second attempt to write the VHD to disk, the old working disk breaks-down. At this point it is around 4AM with 3 hours left and no working drive to fall back to, its time for some drastic measures.

I wrote the VHD containing the os disk (osVHD) to another RAID 1 setup this one mainly contains the database files, being unable to boot the server I took both drives and placed them in separate systems. On the first system I started the import process to our hypervisor cluster (Xenserver), on the second system I started the upload of the SQL databases to a new virtual disk on the main Xenserver cluster. After a short time I noticed this would take to much time, importing the OS disk alone would take over 4 hours, and I had about 2.5 hours left. So I switched tactics, I had a VHD which is the native virtual disk format for windows, including Hyper-V. so I installed Hyper-V on a lab system, connected one of the RAID1 Disks to it and created a new VM with the osVHD, it booted at the first attempt.

Now I only had to get the database files to the new VM, to do this I created a new VHD, mounted it locally and copied all databases to it. Next I attached the VHD containing the databases to the VM and we where back online.

At this point it was just before 7AM and some of my colleges were already entering the office, but the server was working again be it on one (fairly new) disk. Fortunately it was Friday, so it would only need to work for about 12 hours before I would have an entire weekend to migrate the VM to our Xenserver cluster.

That Friday evening I started working towards the migration to the Xenserver cluster. My initial idea was to prepare the VHD for direct import.

First order of businesses was to shrink the OS disk because it would consume 1 TB on the cluster while there was only 200GB in use. Before this could be done the disk needed to be defragmented, after defragmentation the partition could be shrunken down to around 400GB because there was a “unmovable file” in the way (Windows limitation). 400GB was still way better than 1TB but I had only shrunken the partition, the disk size was still 1TB and since Xensever will import the entire disk (even if there is no data on it) this would be a problem.

The process of shrinking the partition took about 4 hours, and required a trip back to the office, because I did not enable remote desktop to the hyper-V server (is was late alright).

luckily there is a solution for every problem. In the old day’s, up until Xenserver 6.2, there was a physical to virtual import utility available, and I still had a copy of it. Of-course it was no longer possible to directly import a “physical” machine to our Xenserver cluster, but it could still export an XVA (Xenserver Virtual Appliance).

After so many problems there was finely a stroke of luck, or not.. During the export the makeshift Hyper-V server gets a BSOD on a Realtek driver. The second attempt (Saturday evening) finishes without errors and the import starts Sunday morning around 8AM. The import finishes around 3PM (still Sunday) unfortunately the newly created VM outputs a BSOD: “STOP: c00002e2 Directory Services could not start….”. Which roughly translates to: “unable to read Active Directory database (NTDS.DIT)”.

After a lot of digging around , I notice the boot driveletter has changed from C to H. After changing the driveletter back to C by following this article form Microsoft, the server starts functioning again :).

At this point it is around 6PM on Sunday. The server is back up, and all applications are working again.


A lot of lessons can be learned from this experience, for example:

  • Relying on 7 year old drives for a critical core businesses application is not a good plan. The typical lifespan of a HDD is about 5 years, after this time we need to swap out drives of critical  systems.
  • New and old drives don’t always mix. Making the translation to virtual first and later trying to restore to physical is a good way to go, especially with older drivers.
  • A single physical server is not adequate for a critical core businesses application. Redundancy is important either on the Hypervisor level or at the application level.

image from: https://www.datarc.ru