I recently discovered that my employers database server was running out of storage space on the database volume. After some searching I traced the problem to our Xendesktop site transaction log file witch had grown almost 80GB in 3 months.
I never noticed problems with the transaction logs before but previously the SQL server was a physics machine with around 1 TB storage for the databases while the new database server is a VM with only 350GB available for the databases.
If you work with Microsoft SQL server from time to time, you might know that a database usually consists of two files. The database file “<dbname>.mdf” and the transaction log file “<dbname>.ldf”. The database file stores the current version of the database while the transaction log file saves all changes to the database. It is important to have a transaction log, because it enables you to rollback the database to a point in time, or recover the database after a software crash or an unexpected power failure.
There are 3 modes in with the transaction log can operate: Full, Bulk-logged and Simple. I wont be going into detail about the different recovery models, Microft has a good article about this subject.
In short, Full saves all transactions indefinitely while Simple removes them after committing them to the database. Bulk-logged is almost the same as Full but it has some enhancements for logging bulk transactions.
Our Citrix database was configured to use the Full recovery model, this is the default setting.
To solve this issue while retaining the ability to recover data in the event of a crash we will have to set up transaction log back-ups. If configured right this can be an automated process.
Follow the following steps to back-up a transaction log:
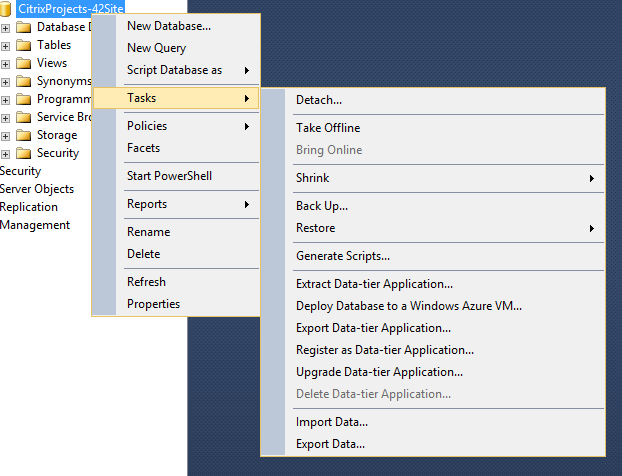
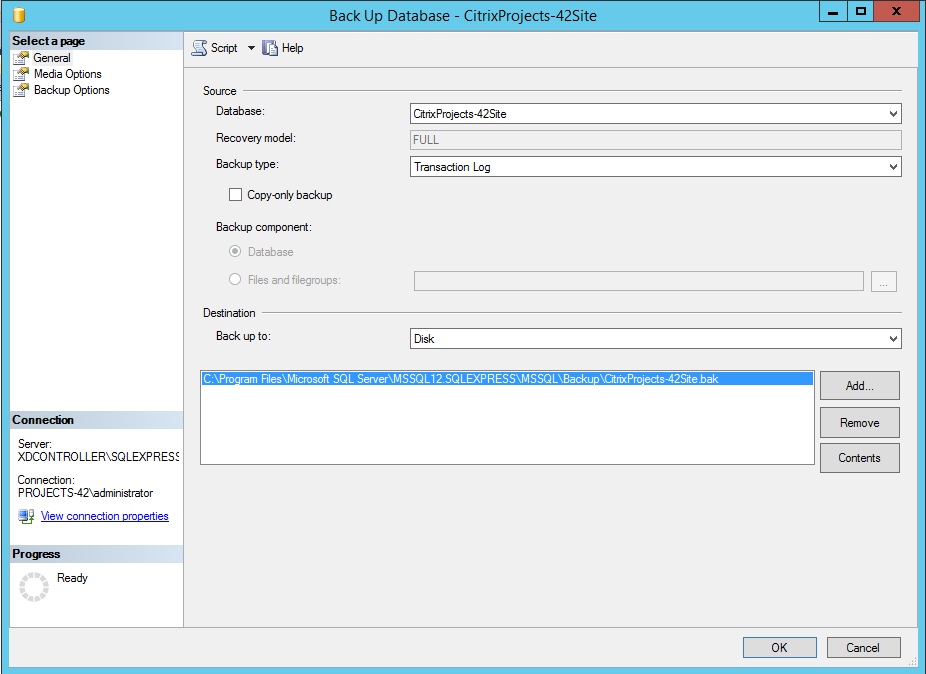
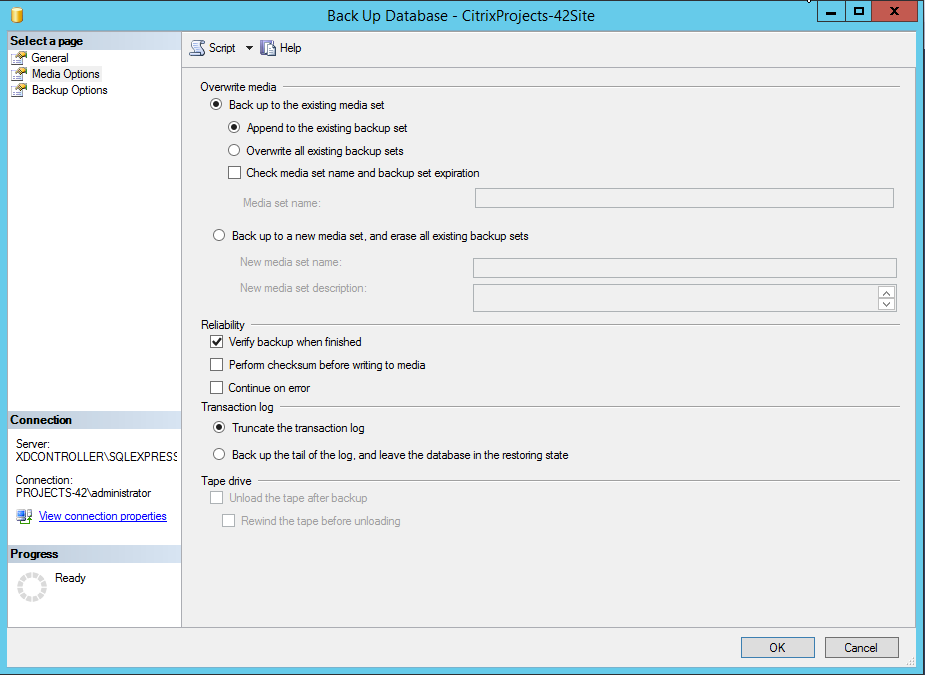
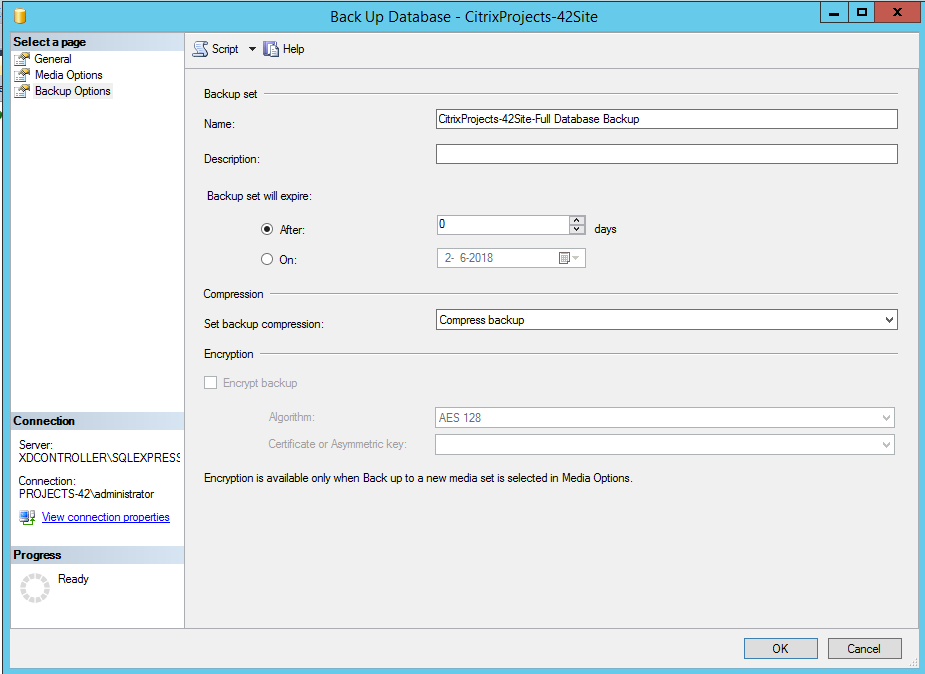
At this point you can simply click the OK button and the backup will start. In this case it will be a one time only backup. We ICT people like to automate things so we wont have to repeat actions over and over again. Fortunately, we can turn this process in a automated task.

Unfortunately SQL server Express edition wont allow automated jobs so for the rest of the process i have used a much older SQL Server Standard Instance
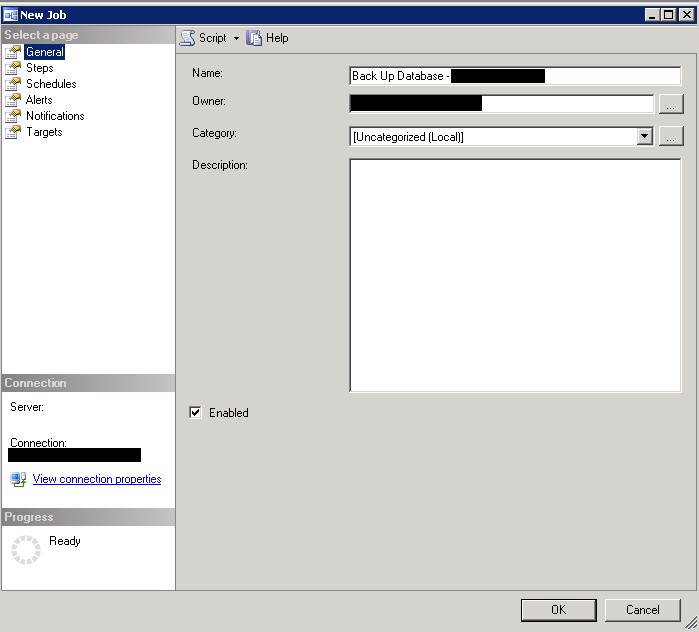
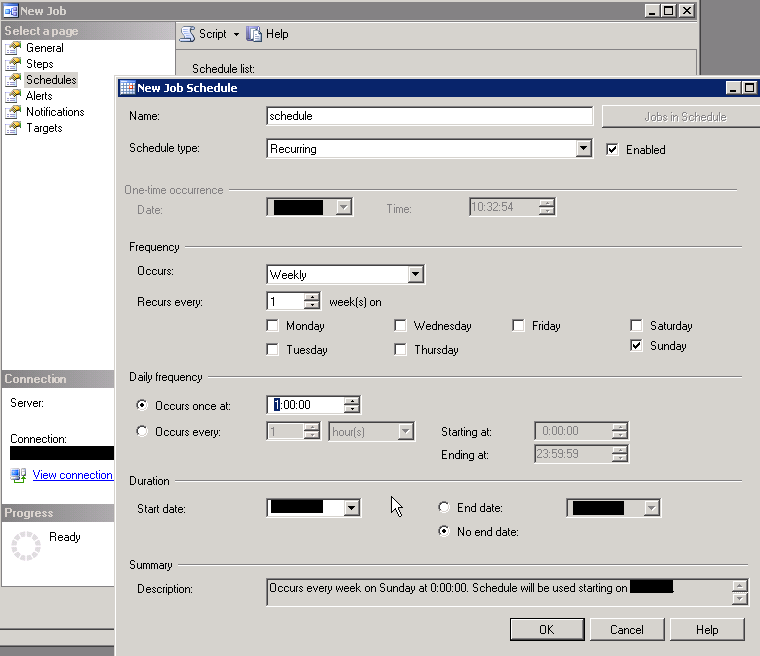
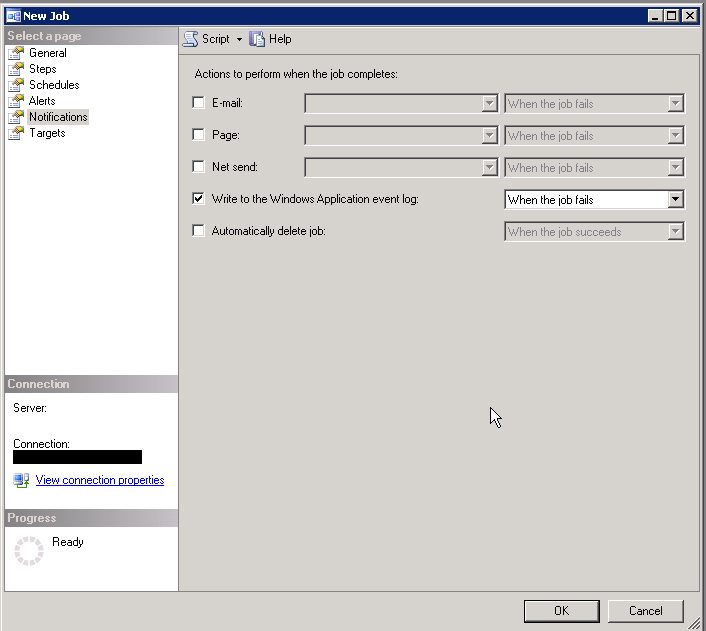
If everything went as planed, we now have an automated transaction log backup Job. Unfortunately the transaction log remains the same size as it was before. to release the backed up space we need to shrink the Transaction log.
WE DON’T WANT TO SHRINK THE TRANSACTION LOG TO OFTEN, GROWING THE LOG IS A SLOW PROCESS!!!
If your transaction log is huge and you want to reclaim some of the space, continue following these steps:
to be able to shrink the transaction log file, we first need to switch the database to simple recovery mode.
click right on the database you want to shrink and click on “Properties”.
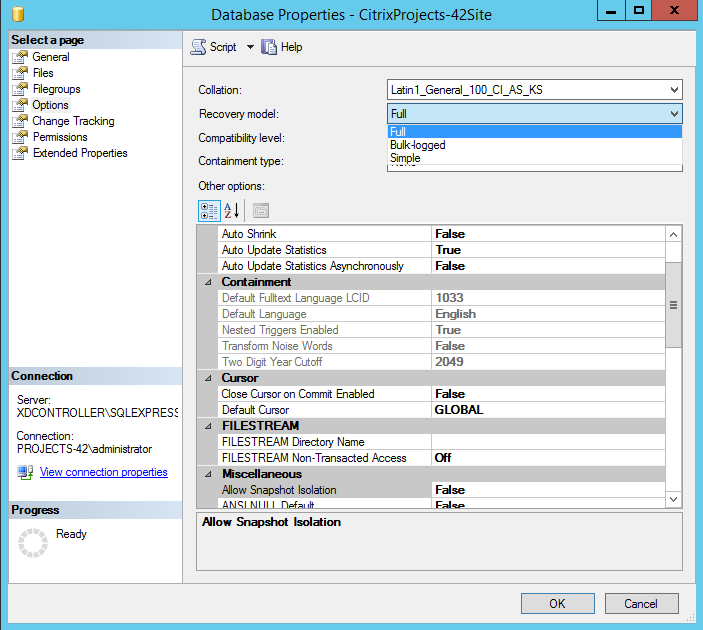
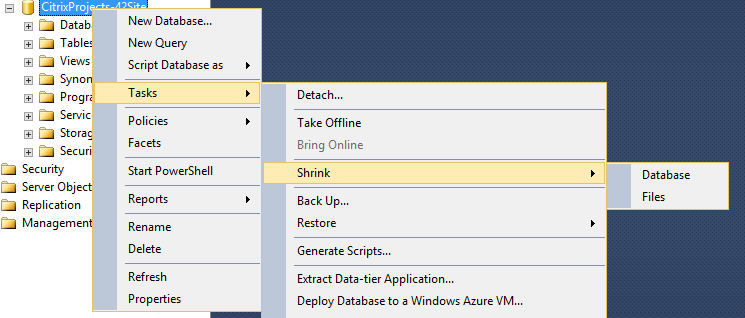
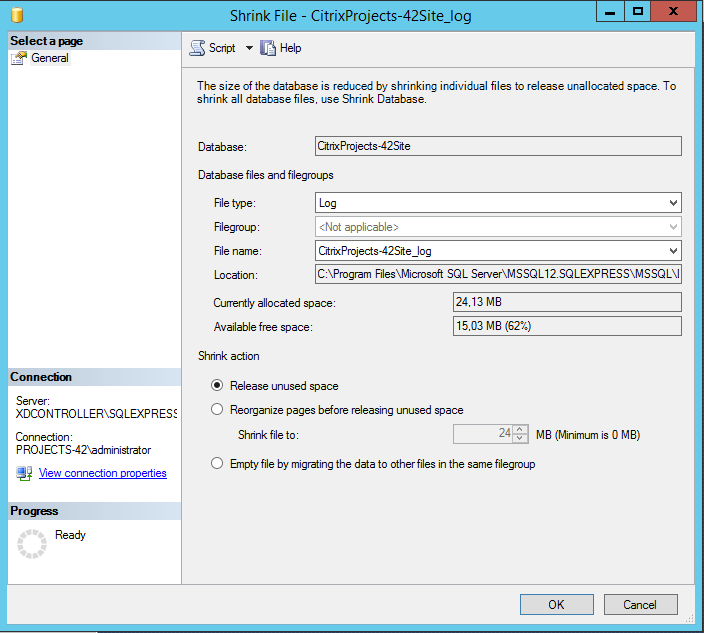
Don’t forget to change the recovery model back to full, if it was set to full to begin with 😉